


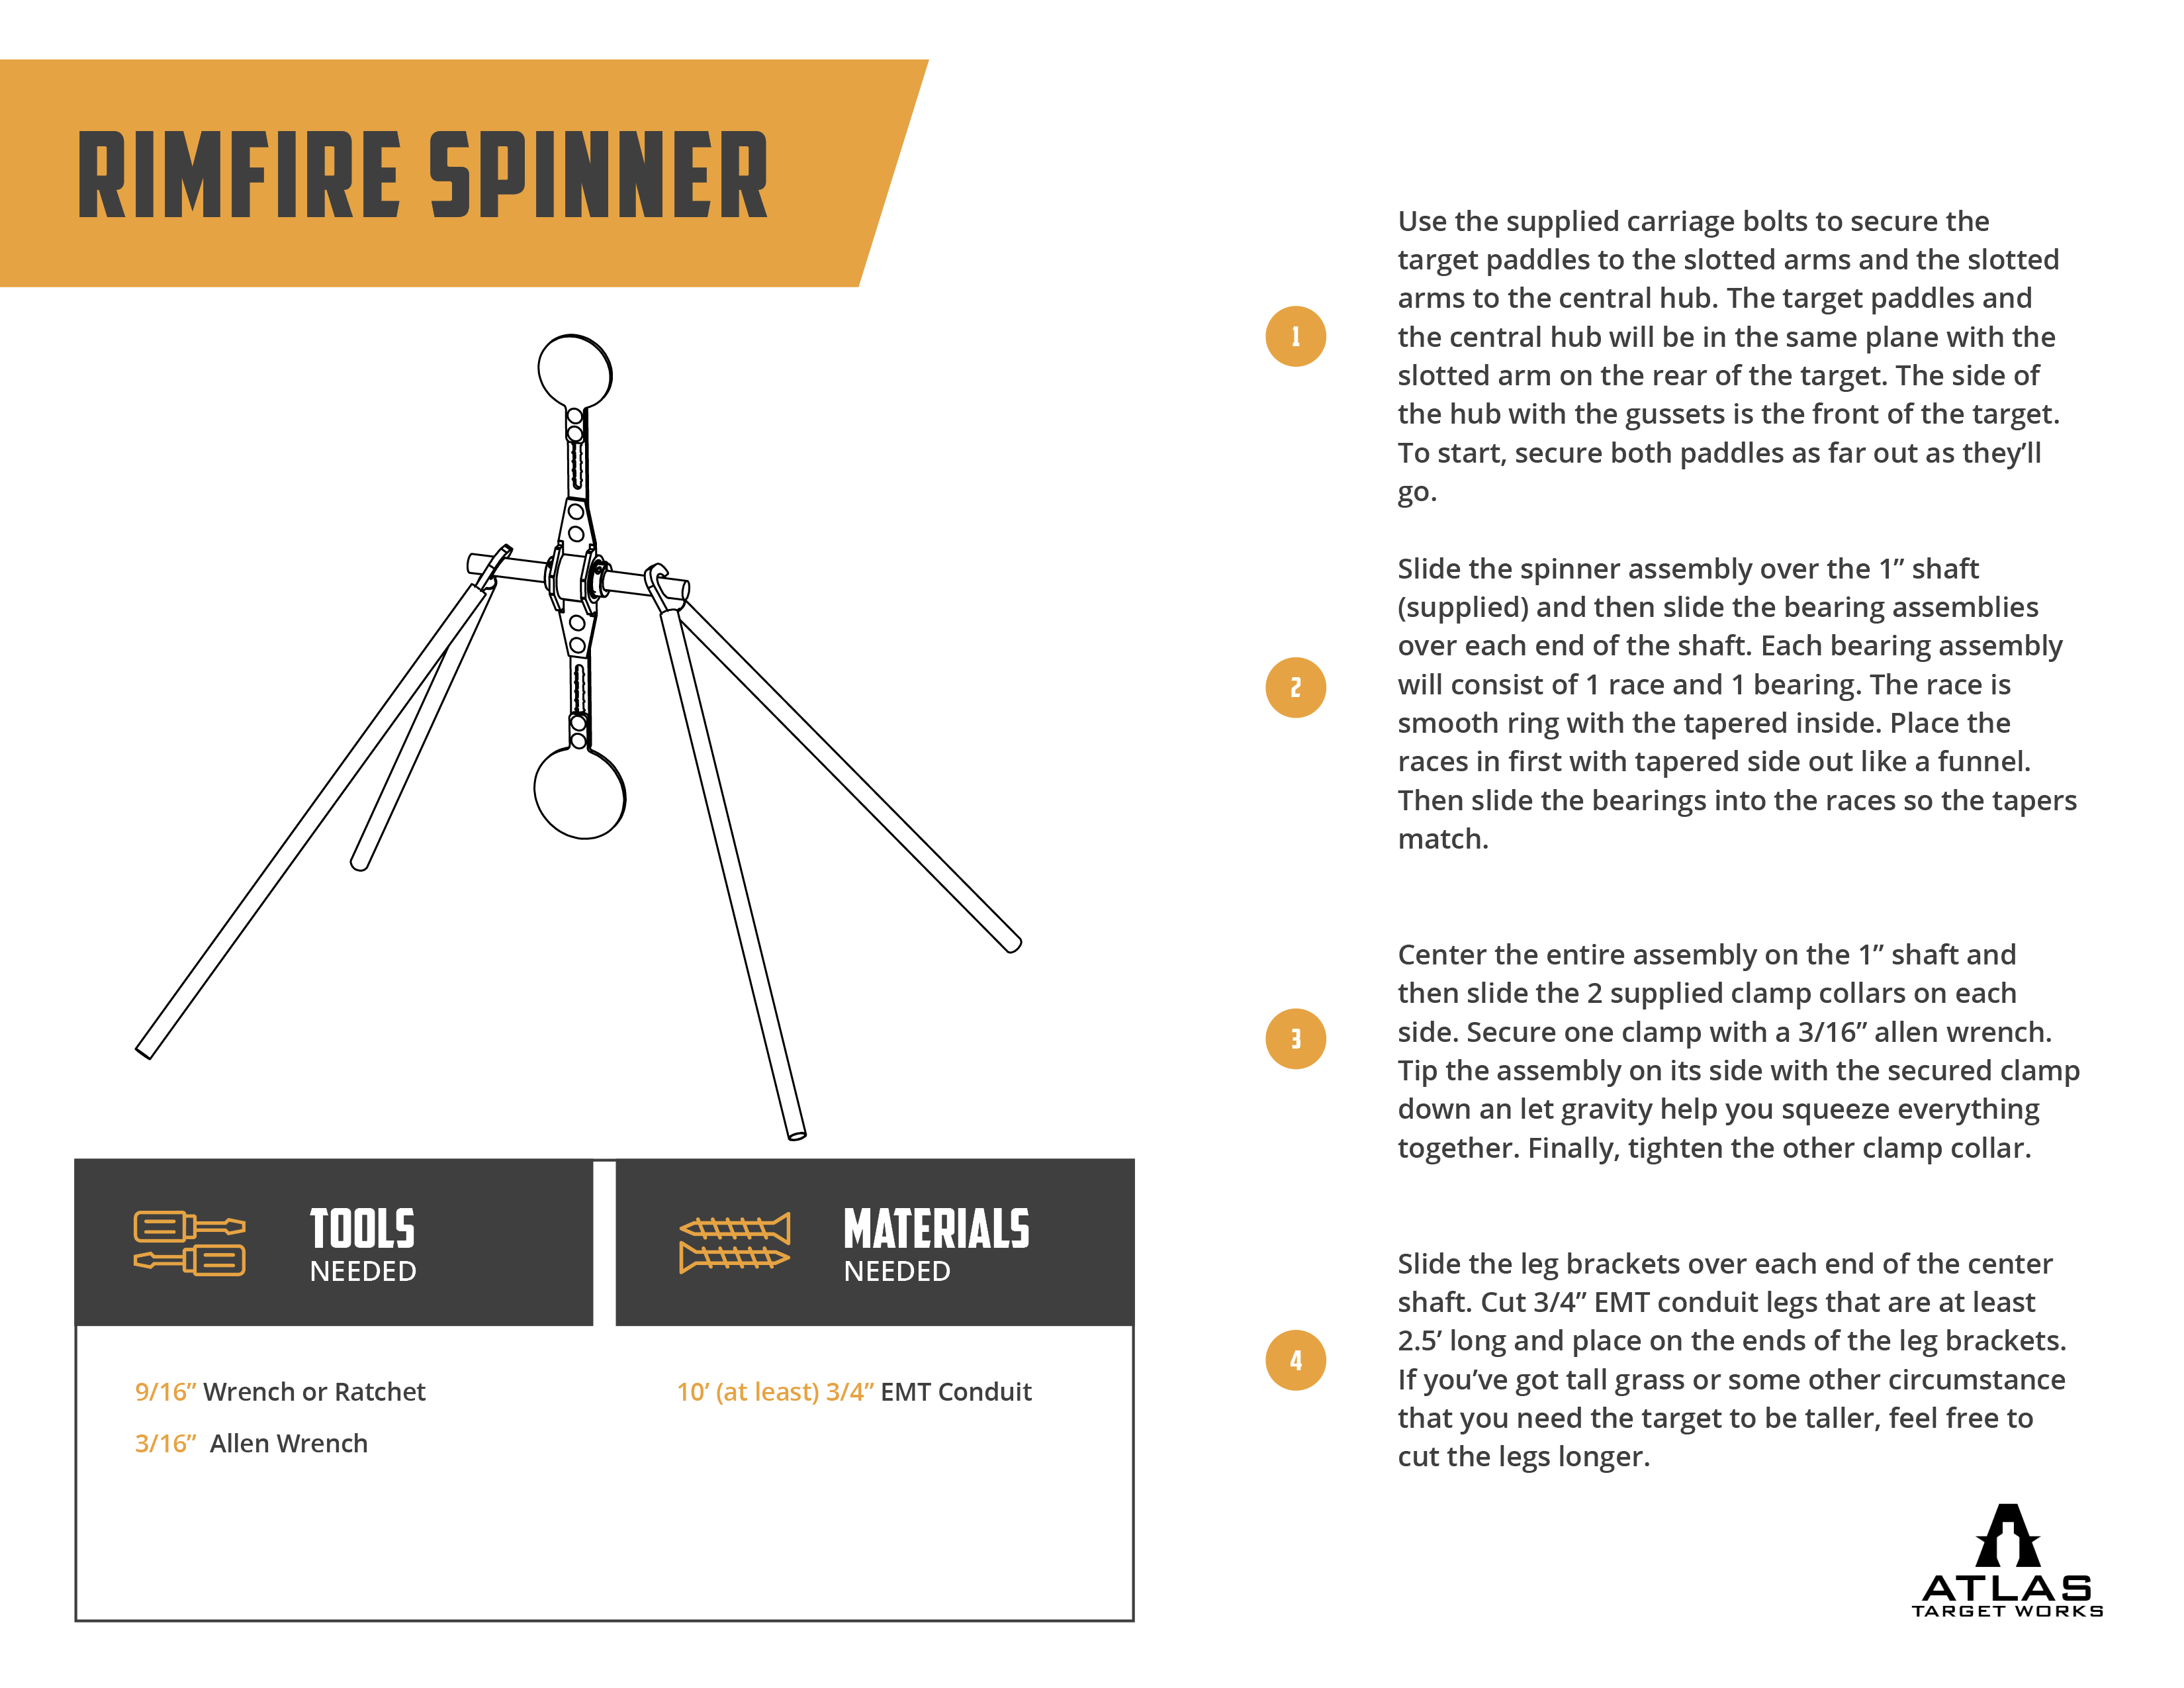

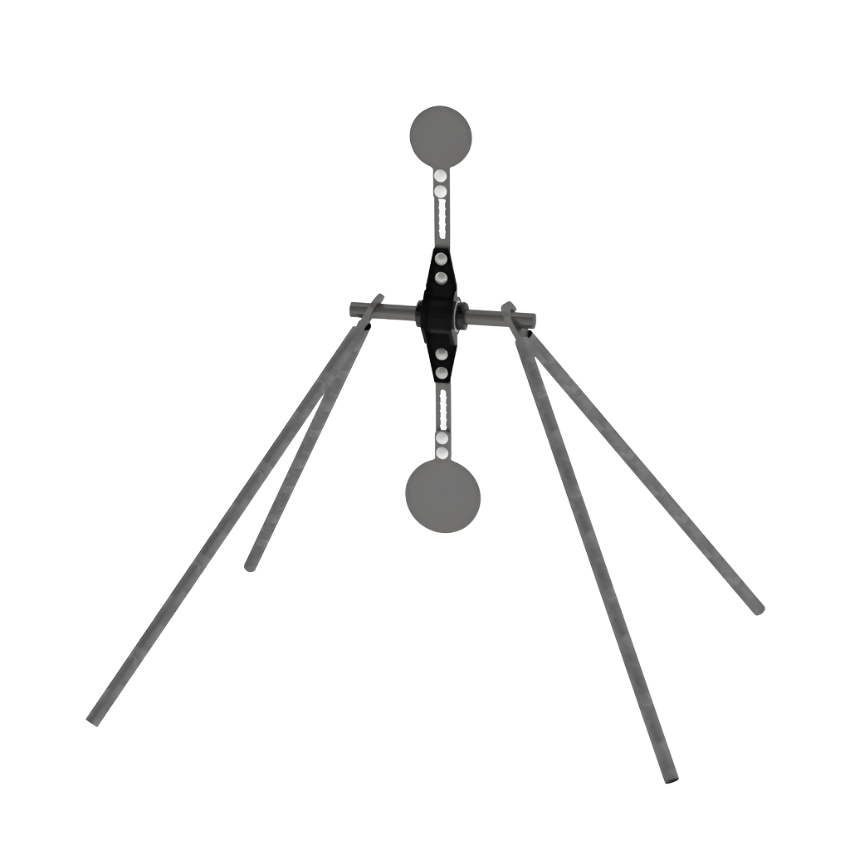


Adjustable Rimfire Spinner Target
$ 199.00 - $ 239.00
Free Shipping
100327-250
- CNC laser-cut in the USA from American-made SR500+ steel
-
SR500+ steel is more durable and better suited for steel targets than AR500
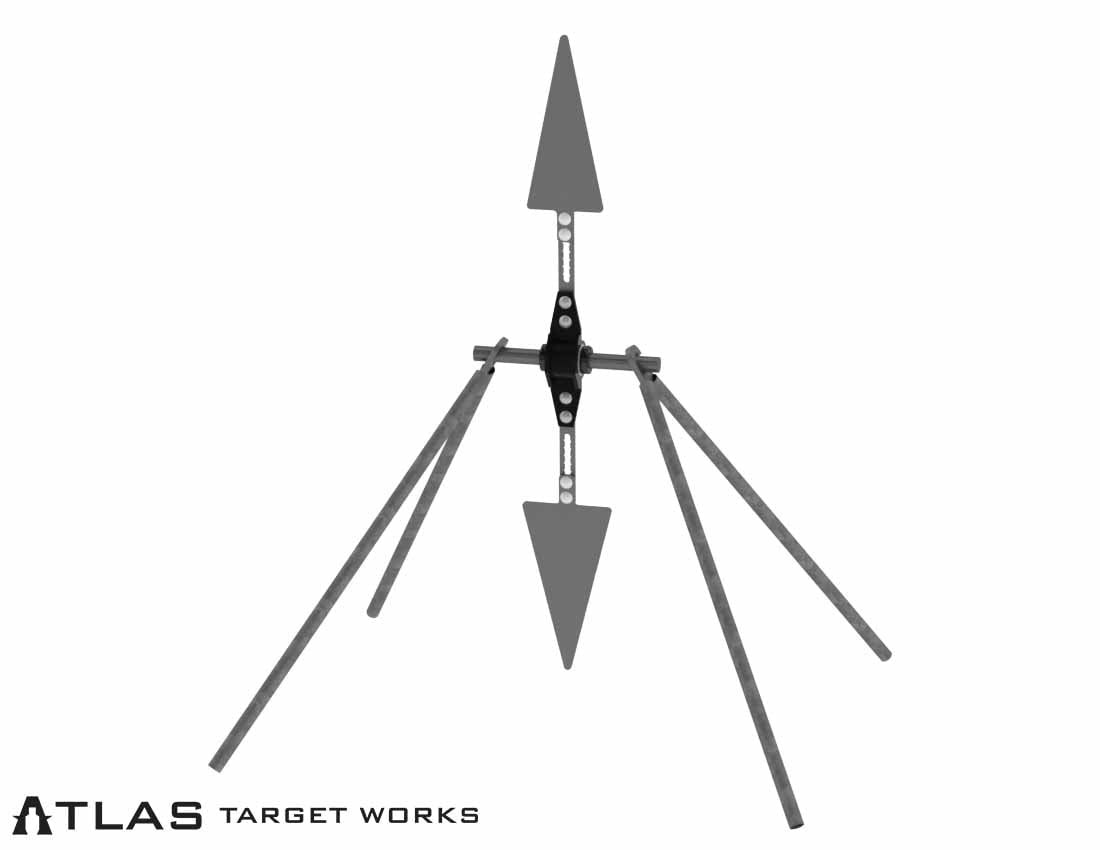
- Central hub glides on two bearings for an extremely smooth and consistent swing in any temperature
- The target plates can be adjusted to change how the target spins adding a ton of versatility
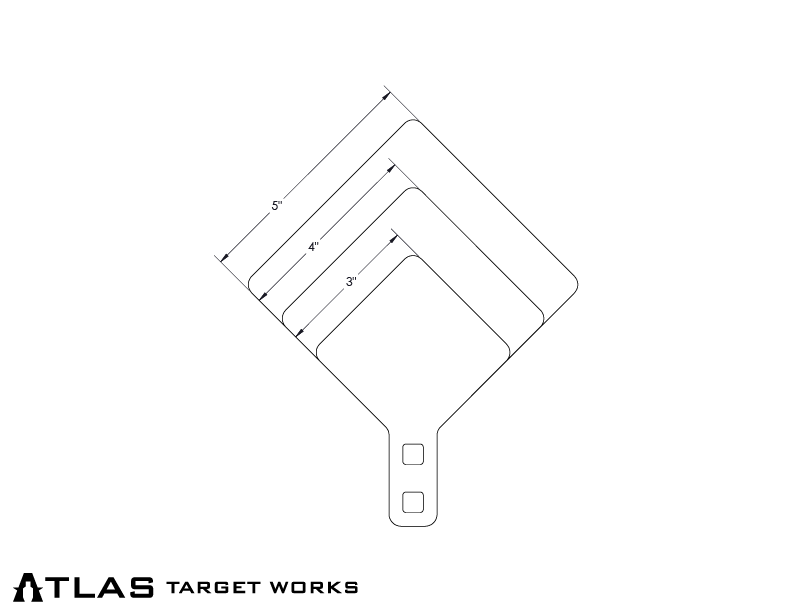
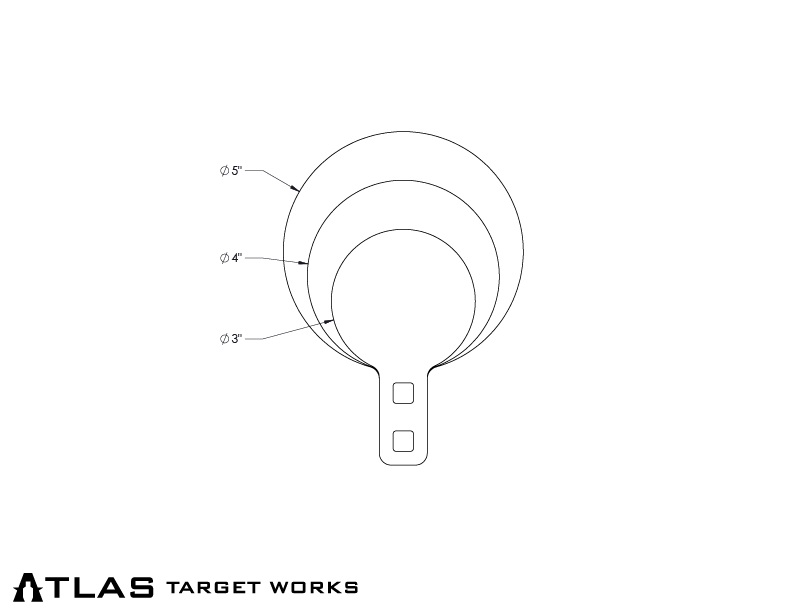
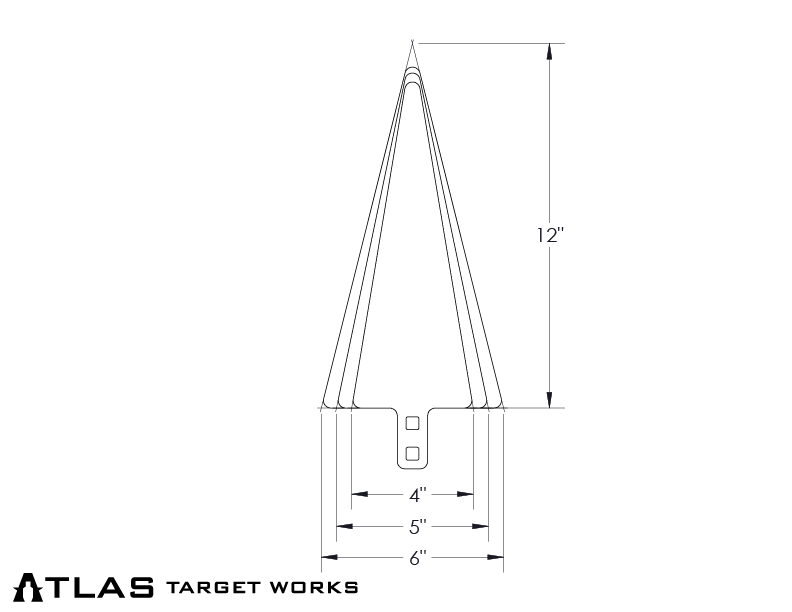
- Comes with (3) interchangeable target plates (see pictures for specific shape dimensions)
- Comes with everything need to hit the range
- If you already have the spinner and just want the bolt-on plates you can check them out here
- Target does NOT come painted